Showing posts with label easter. Show all posts

Saturday, April 23, 2011

An Eostre Story.


eastbun1bw
One perennial symbol of Easter is the Easter egg. The Phoenicians, Persians, Hindus, Egyptians, and Chinese believed that the world was created out of an enormous egg. In one Hindu myth from ancient India, this Egg of the World broke into two separate halves, each representing the underlying illusory duality or maya in all of Creation. A golden half symbolized the sky while a complementary silver half represented terra firma or earth’s soil and seas.


This eternal egg has come to symbolize fertility and procreation, or the birth and spawning of new Life itself. The Easter Bunny? Of course, rabbits are prodigiously fertile, and are often regarded as fertility symbols. Oestre was said to have been importuned by a giant bird that desired to be transformed into a rabbit, and when she complied, he gratefully laid eggs each spring as a ritual offering.


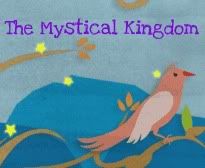
Eostre, the Anglo-Saxon goddess of springtime, was bringing spring to the land when she happened upon a girl who was weeping in the forest. For the girl did not know what to do. The girl had found a bird who had frozen to death in the snow. Taking pity on her, Eostre went to the girl to bring the bird back to life for she couldn't bare to see the girl feeling so sad but Eostre could not save the bird's wings so she turned the bird into a rabbit.

Eostre, OestreHaving once been a bird, the rabbit retained its ability to lay eggs and every Eosturmonath (Eostre month/April) the rabbit would lay eggs in all the bright colours of spring as a thankyou to the goddess Eostre for saving its life.

And that is the story of the 'easter bunny' and the tradition of why we decorate eggs in bright colours. Eostre was the goddess of springtime and fertility hence the further symbolism of rabbits (procreation), eggs (fertility) and chocolate (aphrodisiac).

Monday, April 18, 2011

Easter Fantasy and Natural Dyed Eggs


I saw the Easter Bunny as he quickly hopped along,
His heart all bubbling over with a happy Easter song.
He gathered eggs from here and there,
prepared his colored dyes
and in a most efficient way he
proved to be quite wise.


Down the lane to pixie land where elves and fairies play,
Where kitten fluff was happily at work with doggy tray,
so many chores that must be done before that Easter dawn
when children searched for colored eggs just when the night is gone.


Carefully he checked his list of every girl and boy,
some colored eggs for everyone,
perhaps a sparkling toy.
How happily he did his work,
each basket quickly done
and he was off upon his way for lots of Easter fun.


Mister Bunny wined his eye and scurried on his way
for everything must be just right for children Easter day.
Their Easter dreams must all come true,
Each basket filled so grand
and Mister Bunny planned it all
in Easter Fairyland.

By Garnett Ann Schultz


Tuesday, April 12, 2011

Hop into Easter and Spring with these beautiful Eggshell Tulips

I have seen so many lovely Easter and Spring crafts online recently. That I was inspired to make some of my own to share with you all. You can make this craft work well for any age group.


Here are the following items you will need to create these lovely little flowers:

Pipe cleaners (Depending on how many flowers you want to make)
Green paper
yellow or orange paper
Blown eggs/hard boiled eggs cracked in half
Green wool roving
food coloring


 So first you need to dye your eggs. We choose a beautiful golden yellow. If you are working with young children it is best to make hard boiled eggs and dye the eggs first then crack them in half yourself after.


After the eggs have dried a bit you are all ready to begin.If you started with hard boiled eggs this point you need to take a nail and poke a whole into the bottom of the egg .  Take your yellow or orange paper and cut it with a fringe like your making grass. Now you'll have everything all set. You can lay out your items like I have for easy assembly.


 Next you will take a small amount of your green roving and wrap it around your pipe cleaner like so....


Then gently rub it between your hands to secure all roving together. You can do this a few times until it is nice and tight.


 Like this picture below....


Then take your yellow or orange paper and roll it up like the following pictures....


Then start to fan it out a bit ...


You should have something similar to this...you can secure it with tape...


Now take your eggshell half and pick up your pipe cleaner and poke it up through the bottom then bend it over so it doesn't fall out.


Get your glue gun and squirt some glue into the egg ( you can use elmers glue if working with younger children or even tacky glue)


and add your yellow or orange piece to the center like this...


Glue on your leave to the stem....


And that is it!! You can place your flowers into a vase or flower pot . They make a perfect homemade gift for Easter,Mother's Day,Grandparents,Aunts or make a bouquet to give to a friend.


Ours are growing out of this flower pot :)


HOPPY SPRING !!!


Do you have any special crafts you make for Spring or Easter?


Monday, February 21, 2011

Patchwork egg craft


A craft your great grandmother may have done was patchwork quilting. During olden times, woman used every scrap of material they had saved and sewed them together. They used this patchwork sheet to create clothing, curtains or bedspreads. You won't need a needle and thread  for this patchwork project though. A dab of glue and an egg will create an old fashioned delight for you or as a gift.

Things you will need:

  • scissors
  • colored tissue paper or scraps of fabric
  • white glue (like elmers)
  • cup
  • paintbrush
  • blown ( or hard boiled) eggs

 
To Begin :

  1. Cut colored tissue paper or scrap fabric into square or rectangular shapes about the size of a stamp.
  2. Pour white glue into a cup
  3. Paint an area of the egg with glue and place the tissue paper or fabric on the glued part of the egg
  4. Then add more glue and overlap the next pieces of tissue or fabric until the whole egg is covered
  5. Smooth out and bumpy spots with your fingers and cover any spots that are showing with additional paper or fabric. Set your egg aside to dry.
These eggs are perfect for Easter or decorating for spring. 
Related Posts Plugin for WordPress, Blogger...